
CMYK Printing Image Density Standards: A Comprehensive Analysis
I. Core Definition and Essence of Image Density
Image density (color density) is an indicator used to quantify the ink’s ability to absorb light. The formula is:
D = log₁₀(incident light flux / emitted light flux). For CMYK colors:
• The value is directly proportional to the ink layer thickness: the thicker the ink layer, the stronger the light absorption, and the higher the density value (but beyond a critical ink layer thickness, the density growth tends to stabilize; the critical thickness for black ink is typically 3-5μm).
• The essence of control: density serves as an indirect indicator of color reproduction. The four CMYK colors need to be controlled in collaboration to ensure dark tones don’t get muddied and bright tones maintain detail. Additionally, black ink enhances the contrast and detail in the shadows.

II. Core CMYK Density Reference Range
Combining ISO international standards, domestic regulations, and industry practices, the following are the mainstream reference values for full-tone density (100% dot area):
| Color | Normal Reference Range (T Status) | Detailed Scene Standards | Key Notes |
| Cyan (C) | 1.30 – 1.55 | Offset (Coated Paper): 1.4±0.1, Digital Printing: 1.35±0.1 | Significantly influenced by paper brightness, matte paper is 0.05-0.10 lower than coated paper |
| Magenta (M) | 1.40 – 1.55 | Offset (Coated Paper): 1.5±0.1, Flexo Printing: 1.35±0.1 | High density may cause color shifts, should maintain a density difference of 0.05-0.10 with cyan to ensure gray balance |
| Yellow (Y) | 1.00 – 1.10 | General Standard: 1.05±0.07, Fine Printing: 1.1±0.05 | Lowest density color plate, excessive thickness can cause muddy colors, density difference with magenta should be ≥0.35 |
| Black (K) | 1.40 – 1.85 | Fine Printing: 1.6-1.85, General Printing: 1.4-1.6 | Determines shadow depth; too low a density can cause grayish tones, too high can lead to smudging and poor drying |
Note: Halftone areas should be adjusted based on the TVI (Tone Value Increase) curve. The density for 50% dot areas is typically 40%-50% of the full-tone density.
III. Key Influencing Factors and Calibration Logic
- International Standard Basis: ISO 12647-2 Deepened Application
• Core principle: Reverse calculation of optimal four-color densities based on CIELab color values and gray balance targets. Black color needs to focus on controlling L-value (brightness) to ensure the purity of dark tones.
• Four-color standard Lab values (for coated paper FOGRA51 targets):
CMYK Standard Lab Values and Key Control Indicators
| Color | Standard Lab Value | Key Control Indicator |
| Cyan (C) | L = 54, a = −36, b = −49 | b value must be ≤ −45 to avoid greenish shift |
| Magenta (M) | L = 46, a = 72, b = −5 | a value must be ≥ 65 to ensure vibrant magenta tone |
| Yellow (Y) | L = 88, a = −6, b = 90 | b value must be ≥ 85 to avoid dull/grayish yellow |
| Black (K) | L = 16, a = 0.07, b = −0.33 | L value ≤ 18; a and b values close to 0 to avoid color cast |
- Four-Color Interaction Calibration Logic
• Gray balance control: Use a 40% C/30% M/30% Y neutral gray block as the base, and the measured Lab values should meet L=50±2, a=0±1, b=0±1. Adjust C/M/Y density deviations to achieve this balance.
• Overprint density requirements:
- CM overprint density ≥2.0
- MY overprint density ≥1.8
- CY overprint density ≥1.9
Ensure secondary color saturation.
- Expanded Measurement Conditions
• Density calculation status: In China, T status is the default, while in Europe, E status is commonly used (more sensitive for K plate measurement, resulting in 0.05-0.10 higher density values than T status).
• Lighting conditions: Papers with fluorescent whitening agents should be measured under M1 conditions. For black ink, avoid direct light sources causing reflection errors. Polarized light attachments are recommended.
IV. Key Points for Density Measurement and Quality Control
- Tools and Calibration:
Use X-Rite or Techkon series densitometers and calibrate daily with standard color targets (measurement error ≤0.03). Verify Lab values monthly with a spectrophotometer. - Four-Color Synchronized Measurement:
Choose CMYK full-tone blocks, overprint color blocks, and gray balance blocks from the printed sheet for measurement. Record both density and Lab values in the sequence of “single-color first, then overprint.” - Deviation Tolerance Upgrades:
- Single-color density fluctuation: ≤±0.07 (looser than CMY standards, as K plate has a wider density range).
- Four-color relative deviation:
- C and M density difference ≤0.15
- K and CMY maximum density difference ≤0.40
- Batch-to-batch density consistency: ΔE ≤ 2.0 (total color difference for all four colors).
V. Standard Density Differences for Typical Printing Methods
| Printing Method | C Density Range | M Density Range | Y Density Range | K Density Range | Core Control Focus |
| Offset (Coated Paper) | 1.4-1.5 | 1.45-1.55 | 1.0-1.1 | 1.6-1.8 | Water-based ink balance control, avoid K plate smudging |
| Digital Inkjet | 1.3-1.4 | 1.35-1.45 | 0.95-1.05 | 1.5-1.7 | Uniform ink drop output, control K plate halo |
| Flexo Printing | 1.25-1.4 | 1.3-1.4 | 0.9-1.0 | 1.4-1.6 | Ink transfer on anilox roll, avoid K plate thin ink layer |
The Deep Analysis and Countermeasures for the Bleeding Phenomenon in Printing Systems
In the field of inkjet printing technology, the phenomenon of bleeding (also known as color spread) is a typical quality degradation issue that directly affects the clarity and color reproduction of the printed output. This paper will comprehensively deconstruct the phenomenon of bleeding in printing systems from five dimensions: essence of the phenomenon, mechanism of occurrence, influencing factors, detection methods, and countermeasures, providing theoretical support for technical optimization and quality control.
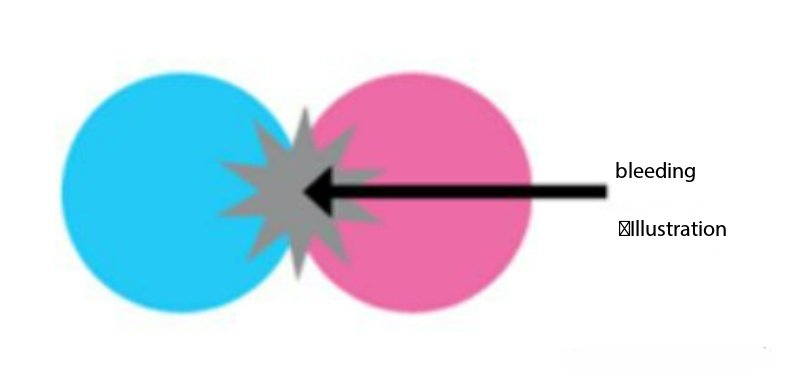
I. Essence of the Phenomenon: From Definition to Visual Features
According to the definition, bleeding is a quality issue that occurs at the boundaries between different colors, with the core feature being “one color spilling into and blending with the other,” ultimately resulting in blurred edges and unclear color boundaries on the print. Visually, the phenomenon of bleeding has the following typical characteristics:
- Boundary diffusion: Originally clear color boundaries form “gradual transition zones,” such as a purple-gray fuzzy zone appearing between the red and blue border, which disrupts the sharpness of the image.
- Color contamination: The spilled color mixes with the target color, causing a local color shift away from the intended value. For example, black ink leaking into a white background creates a “gray mist” effect.
- Scene relevance: Bleeding is more noticeable in high-contrast color combinations (such as black-white, red-blue) or large areas of solid color, while bleeding in low-contrast colors (such as light pink-light orange) is relatively less noticeable.
It is important to note that bleeding is different from “ink splatter” and “smearing”: ink splatter is the scattering of tiny droplets due to atomization during the inkjet process, creating “random spots” outside the image; smearing is the “expansion” of a single color due to diffusion on the substrate. Bleeding specifically refers to the cross-permeation between different colors, and is essentially a mixing issue at the interface of multiple inks.
II. Mechanism of Occurrence: Multi-Step Effects from Ink to Substrate
The essence of the bleeding phenomenon is the “uncontrolled diffusion” of ink on or within the substrate. Its occurrence involves multiple core processes of the inkjet system, which can be divided into physical diffusion and chemical interaction mechanisms:
(A) Physical diffusion mechanism: Natural migration of ink on the substrate
- Substrate porosity: When the substrate (such as regular paper, non-woven fabric) has many pores, the ink will spread to the surrounding areas through the “capillary effect.” For example, when black ink is printed on low-weight paper, the water in the ink quickly penetrates the paper fiber gaps, causing the pigment particles to migrate towards the adjacent red area, resulting in bleeding.
- Imbalanced drying speed of the ink: If different color inks dry at significantly different speeds (e.g., cyan dries quickly, yellow dries slowly), the slower drying ink will flow due to gravity or environmental airflow before curing, spilling into the already partially dried color area. This is especially noticeable in high-speed printing scenarios, where the small gap between print heads allows subsequent colors to mix with undried ink from previous colors.
- Spray quantity control deviation: If the inkjet system has uneven droplet sizes or misalignment in spraying positions, it can lead to excessive accumulation of local color ink. The excess ink, unable to be absorbed or dried quickly by the substrate, will “spill over” into surrounding color areas, forming noticeable bleeding boundaries.
(B) Chemical interaction mechanism: Interference between ink components
- Pigment solubility conflict: If the pigment particles of different color inks have significantly different solubility in the same solvent, it may lead to the pigment re-dissolving and migrating. For example, the azo dye in red ink has a higher solubility in the alcohol-based solvent of yellow ink, so after printing, the red pigment dissolves into the yellow ink, causing the boundary area to show orange-red bleeding.
- pH imbalance-induced reactions: Some water-based inks have a large pH difference (e.g., acidic blue ink and alkaline black ink). When mixed, a chemical reaction may occur, disrupting the colloidal stability of the ink, causing pigment particles to coagulate or disperse, which then leads to bleeding. For example, acidic ink will cause the pigment particles in alkaline ink to precipitate, creating irregular bleeding spots at the interface.
- Surface tension difference causing penetration: The surface tension of ink directly affects its spreading ability on the substrate. If the surface tension difference between two inks exceeds 5mN/m, the ink with lower surface tension will spread towards the region of higher surface tension (as liquids tend to flow from lower to higher surface tension areas), forming “active bleeding.” For example, magenta ink with a surface tension of 30mN/m will penetrate into cyan ink with a surface tension of 38mN/m, leading to a blurred boundary.
III. Key Influencing Factors: The Synergy of System, Materials, and Environment
The occurrence of bleeding is not caused by a single factor but results from the combined effects of the printing system parameters, material properties, and environmental conditions. These can be summarized into the following three key factors:
(A) Printing system parameters: Precision control of hardware and software
- Print head spacing and spray timing: If the physical distance between print heads is too small (e.g., less than 2mm) or spray timing is misaligned, the ink of the subsequent color will directly contact the undried ink of the previous color, increasing the chance of bleeding. If timing is not controlled properly (e.g., printing a new color before the previous color is dry), the ink will overlap for too long, significantly increasing the risk of penetration.
- Ink droplet size and spray speed: If the droplet diameter is too large (e.g., over 80μm), the ink volume per unit area will be too high, and the substrate will struggle to absorb it quickly. If the spray speed is too slow (e.g., less than 3m/s), the droplets will stay in the air longer, becoming subject to airflow, potentially deviating from the target position, indirectly causing ink accumulation and bleeding.
- Software color calibration accuracy: If the color management software in the printing system does not apply “feathering” or “white space” treatment to color boundaries, different color inks will directly overlap at the design boundary. For example, in vector graphic printing, if a 0.1mm color interval is not set, red and blue inks will mix at the theoretical boundary, forming a purple bleeding band.
(B) Material properties: Compatibility of ink and substrate
- Ink component design: The type of solvent (water-based, solvent-based, UV) and pigment content (usually 3%-15%) will affect bleeding. For example, solvent-based inks have a stronger solvent volatility and dry faster, so they are less likely to bleed compared to water-based inks. However, if the solvent is incompatible with the substrate, the ink will slide on the surface and cause bleeding.
- Substrate surface treatment: Untreated substrates (such as regular kraft paper) have high surface roughness and uneven absorption, which makes it easier for ink to spread. In contrast, substrates treated with matte or gloss coatings (e.g., coated paper, PVC films) form a “barrier layer” that limits ink penetration. However, if the coating has pinholes or scratches, it can become a “channel” for bleeding.
- Ink and substrate adhesion: If the adhesion between the ink and the substrate is weak (e.g., van der Waals forces, hydrogen bonding), the ink will easily flow on the surface. On the other hand, if the adhesion is too strong, the ink may penetrate quickly into the substrate, and if the penetration speed differs between colors, internal bleeding may occur (seen from the back of the substrate as color mixing).
(C) Environmental conditions: The indirect effects of temperature, humidity, and airflow
- Environmental humidity: High humidity environments (e.g., relative humidity over 70%) will slow down ink drying, especially for water-based inks. Slow evaporation of moisture will cause the ink to remain on the substrate longer, increasing the likelihood of bleeding. Low humidity environments (e.g., relative humidity below 30%) accelerate drying but may cause substrate shrinkage or premature crusting of the ink surface. The ink inside may continue to penetrate, creating “latent bleeding.”
- Environmental temperature: High temperatures (e.g., above 35°C) accelerate solvent evaporation in the ink, potentially causing the ink to dry prematurely during spraying, resulting in “ink droplet clumping.” After printing, clumped droplets may break on the substrate, causing localized bleeding. Low temperatures (e.g., below 10°C) reduce ink mobility, leading to uneven spraying and local ink accumulation.
- Airflow stability: Airflow disturbances in the printing environment (e.g., direct fan blows, airflow generated by people walking) will change the flight path of the ink droplets, causing different colored droplets to mix before reaching the substrate or causing undried ink on the substrate to move, indirectly triggering bleeding.
IV. Detection and Evaluation: Methods to Quantify the Extent of Bleeding
To objectively assess the severity of the bleeding phenomenon, standardized detection methods must be established, judged from both visual observation and quantifiable indicators:
(A) Visual observation method: Qualitative judgment of bleeding levels
Using standard light sources (e.g., D65 light source, color temperature 6500K), observe the color boundary region at a 45° angle from a distance of 50cm. Based on the blurriness, classify the bleeding into 4 levels:
• Level 0 (No bleeding): Clear color boundaries, no blurring or mixing areas.
• Level 1 (Slight bleeding): A very narrow mixing band at the boundary (<0.1mm wide), visible only under a magnifying glass.
• Level 2 (Moderate bleeding): A mixing band of 0.1-0.3mm wide, visible to the naked eye, but does not affect overall image recognition.
• Level 3 (Severe bleeding): A mixing band >0.3mm wide, clear color mixing, causing loss of image detail (e.g., blurred text edges, deformed image outlines).
(B) Quantitative detection method: Precise measurement of bleeding indicators
- Boundary diffusion width measurement: Use a high-precision image analyzer (resolution ≥1200dpi) to capture the color boundary area. Measure the maximum width of the bleeding mixing band using image software (e.g., ImageJ) as a quantitative indicator. For example, if the mixing band width between red and blue is 0.25mm, it can be classified as Level 2 bleeding.
- Color deviation value (ΔE) detection: Use a spectrophotometer to measure the color difference (ΔE) between the bleeding area and the target design color. The larger the ΔE value, the more severe the color deviation caused by bleeding. Typically, ΔE <1.5 indicates negligible bleeding, and ΔE >3.0 requires technical adjustments.
- Drying time test: Use a drying time measuring device (e.g., finger touch drying method, blowing ball drying method) to measure the drying time of different colored inks. If the drying time difference between two inks exceeds 5 seconds, optimize the ink formulation or printing parameters to reduce the risk of bleeding.
V. Countermeasures: From Source Control to Process Optimization
Based on the mechanisms and influencing factors of bleeding, solutions can be developed from three aspects: optimizing the printing system, upgrading material matching, and controlling the environment:
(A) Printing system optimization: Improve control accuracy
- Adjust printing parameters: Optimize ink droplet size (usually controlled between 30-60μm) and spraying speed (3-5m/s) according to ink and substrate characteristics to avoid excessive ink accumulation. Properly set the print head distance (recommended ≥3mm) and spray timing to ensure that the previous color ink dries before printing the next color. Local drying can be accelerated by adding infrared drying devices.
- Software algorithm improvements: Add “boundary white space” functions in color management software, setting 0.05-0.1mm white space in the boundary areas of different colors to avoid direct ink overlap. Use “feathering algorithms” to gradually transition the color boundaries from dark to light, reducing the visual perception of bleeding.
- Hardware calibration and maintenance: Regularly calibrate the print head (e.g., spray position calibration, ink droplet size uniformity calibration) to avoid ink accumulation caused by hardware deviations. Replace aging print parts (e.g., nozzles, ink supply pipelines) to prevent ink leakage or uneven spraying.
(B) Material matching upgrades: Optimize ink and substrate properties
- Ink formulation adjustment: Adjust ink components based on substrate type. For example, for high-porosity paper, use high-solid-content, fast-drying ink; for plastic substrates, use ink that matches the substrate surface tension (difference <3mN/m); control pH differences between inks (recommended difference <1.5) to avoid chemical reactions that cause bleeding.
- Substrate pre-treatment: Apply coating treatment to substrates prone to bleeding, such as coating polyethylene glycol (PVA) on regular paper to form a barrier layer that limits ink penetration. Choose substrates with smooth surfaces and uniform absorbency (e.g., coated paper, PET films) to reduce the physical space for ink diffusion.
- Ink and substrate compatibility testing: Conduct small-batch compatibility tests before formal printing, observing bleeding situations between different color combinations, and selecting ink-substrate combinations with high compatibility. For example, test the bleeding degree of water-based red ink on different papers and select papers with a bleeding grade ≤1.
(C) Environmental control: Create stable printing conditions
- Temperature and humidity control: Maintain printing environment temperature between 18-25°C and relative humidity between 40%-60%, using air conditioning or dehumidifiers/humidifiers for stability. Avoid printing for long periods in high-humidity (>70%) or low-humidity (<30%) environments to reduce the risk of bleeding caused by drying speed imbalance.
- Airflow stability control: Set up windshields in the printing area to avoid airflow directly blowing onto the substrate surface. Control the movement speed of workshop personnel to reduce airflow disturbance; if fans are used for cooling, adjust the wind direction to avoid direct airflow on the printed sample.